Vegetarian Nachos with Fresh Garden Salsa

Vegetarian Nachos with Fresh Garden Salsa

Easy, fast, kid-friendly and delicious!

Recipe

Organic corn chips

1 can organic black beans, drained and rinsed

2 jalapeno peppers, finely chopped

3-4 cups shredded sharp cheddar cheese

Sour Cream

Avocado, chopped

Fresh salsa

On a jelly roll pan evenly place corn chips, black beans and peppers and cheese in that order.  Place in oven with it set on broil for 3-5 minutes on the middle rack.  Remove from oven, serve on plates and top with avocado, sour cream and fresh salsa.


Fresh Salsa

In a blender or food processor pulse:

1 red onion

2 garlic cloves

2 jalapeno or serrano peppers

1 bunch fresh cilantro or parsley

Add 2-3 pounds tomatoes, pulse a few times, keep it chunky.

Pour into bowl and add the juice of one lime and sea salt and pepper to taste.

Growing and Using Medicinal Plants: Elderberry

Elderberry Bush

Elderberries (Sambucus nigra) have not only been a favorite to people for centuries as a remedy for colds and flu, but many animals love it too!  I planted my elderberries from starts last year and I kid you not one of them is 12 feet tall!  They are fast growers!  I have lots of birds that like to feast on them and I am thankful for my little Yorky who likes to chase them away!  If you don’t have a dog to chase away the birds from your berries try using a type of netting to cover the shrubs so the birds can’t get in but the sunlight and water can.

Growing Elderberry

Elderberry can grow up to 30 feet tall given the right conditions.  It grows natively here up in our Utah mountains.  As kids our parents would take us up to the family cabin near Park City and we would pick the berries to make syrup.  Elderberry prefers rich moist soil and can grow anywhere from partial shade to full sun!  Cuttings are used as propagation rather than starting from seeds.  Although they can start from seed, it is much more difficult.  Just make sure you have a good space to put the shrub so it can grow and be happy!

Medicinal Uses for Elderberry

Elderberries are not typically eaten raw, they don’t taste very good for starters and if eaten in large amounts they can cause nausea and upset stomach.  They are best used when cooked.  Be sure not to use the red berries because they are poisonous!

Harvested Elder Flowers

Both the flowers and berries are used medicinally.  The flowers make a good tea for inducing sweating therefore helping to reduce fevers.

Elderberries on Plant

The berries are rich in immune-strengthening, anti-viral properties and are often combined with echinacea.  However, you don’t need to have a cold to use elderberry syrup!  It can be drizzled on pancakes and made into jams and pies!  With my newly harvested honey and the berries coming on it’s been fun to make a little syrup for the family!  Here’s my favorite recipe!

Elderberry Syrup

8 cups fresh elderberries (don’t use any green ones) or 4 cups dried berries

1 cup purified water if using fresh berries or 8 cups purified water if using dried berries.

1 cinnamon stick

4-6 cloves

4 1-inch pieces of fresh ginger

Honey (preferably raw and local)

Fresh Elderberries

Pick all berries off stems and fish out the green ones.  Place in a medium size sauce pan and add water, cinnamon, cloves and ginger.

Simmering Elderberry Syrup

Bring to a low simmer for 30 minutes or until the liquid has decreased by half in volume, be careful not to boil it!  (Your house is going to smell amazing at this point!)  Next strain the mixture and measure the liquid.

Finished Elderberry Syrup

Match the same amount of honey to liquid and stir in until melted.   Keep the syrup refrigerated for up to 3 months!  If using medicinally to fight off a cold/flu, take 1-2 tablespoons several times throughout the day.

Extending the Growing Season with Hoop Houses

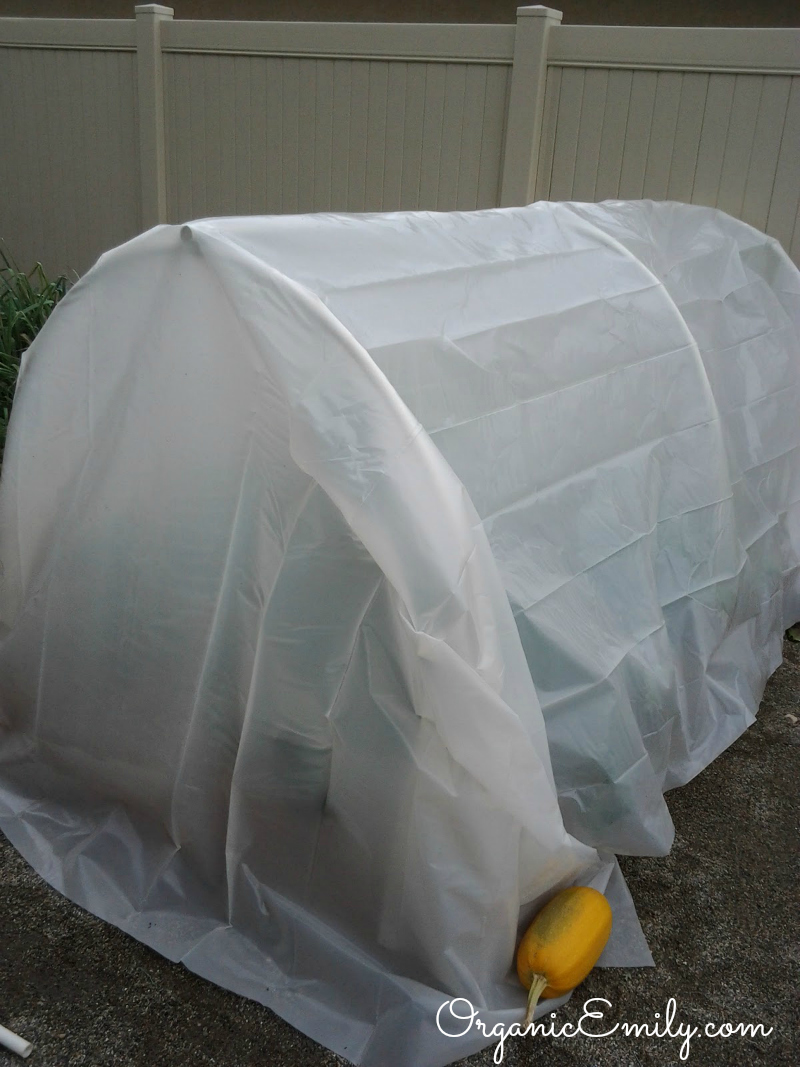
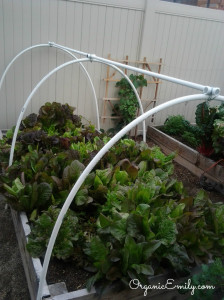
Hoop House 6

I did a post on hoop houses last year and wanted to share it again.  Making a hoop house is very simple and inexpensive!  You can extend your growing season from 3-5 months if you do it right.   Hoop houses and cold frames act as “cold storage” since the crops aren’t growing once the days get shorter and there is less sunlight.  We made our hoop frames towards the middle of October just before it froze, however I don’t suggest waiting that long.  We got lucky, it was a warm fall.   We decided to extend the growing season by making hoop houses over 2 of our grow boxes.  I had a different idea in mind when we put these together.  I thought we would be able to fit the pipes into T fittings and it would hold.  However, they ended up snapping and breaking so we ended up making some inexpensive adjustments.  A year later they are still going strong, so I know it worked!  Here’s what you’ll need:

Materials

8 – 1/2 inch PVC pipes (for 2 4×8 boxes)

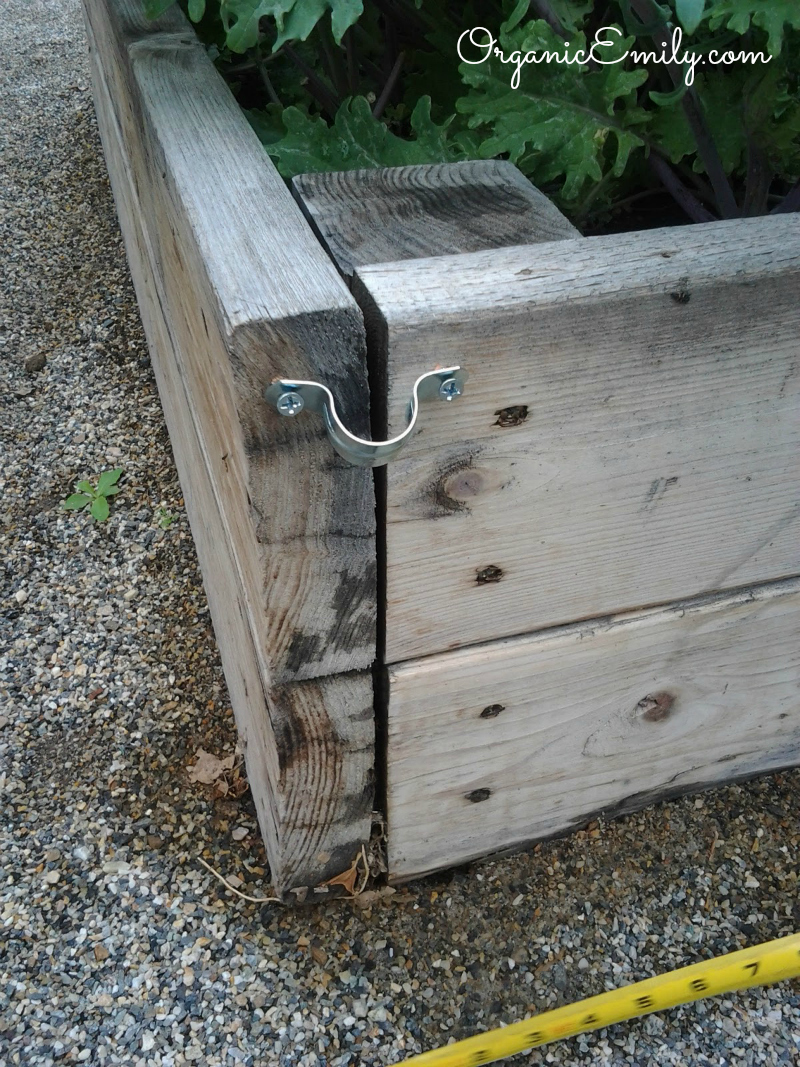
12 small metal brackets( from the electrical isle of Home Depot) with screws to anchor pipe to grow box (see picture below)

Wire to wrap the pipes together

Painters plastic as thick as you can find it (6-8ply)

Clamps for holding down the plastic

Heavy fabric row covers for additional insulation
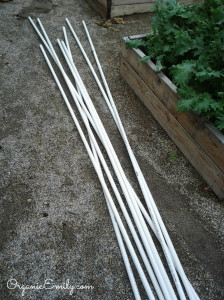
Hoop House 1

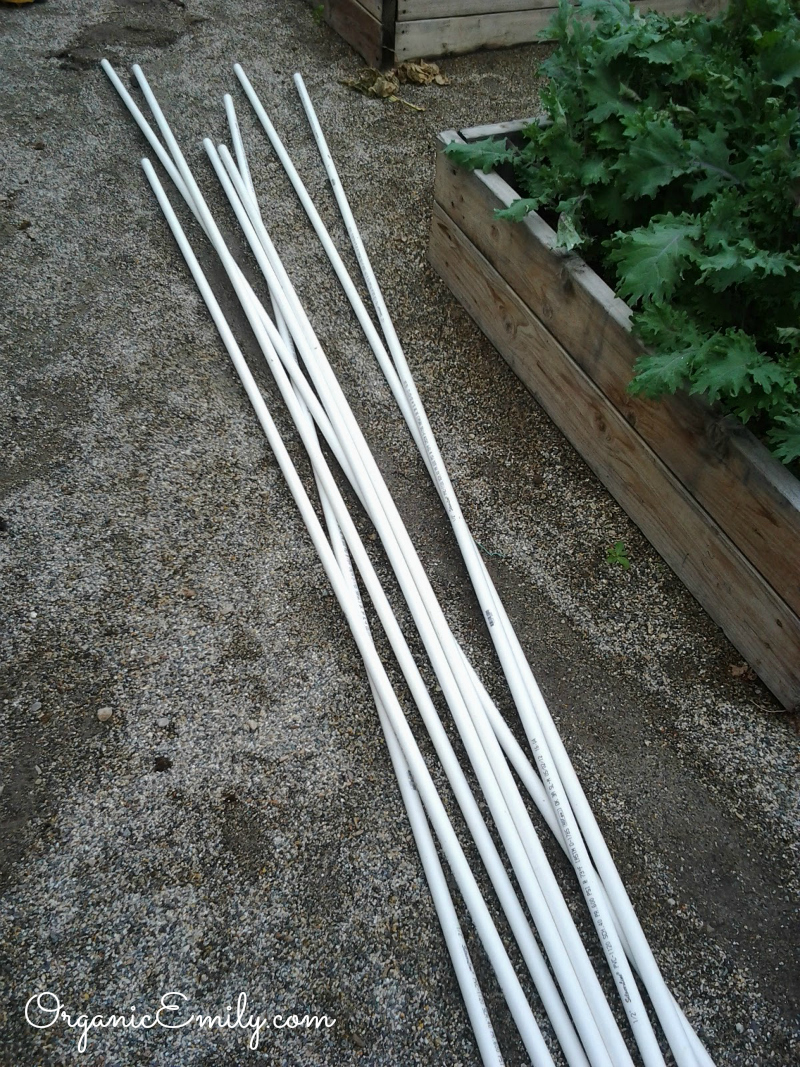
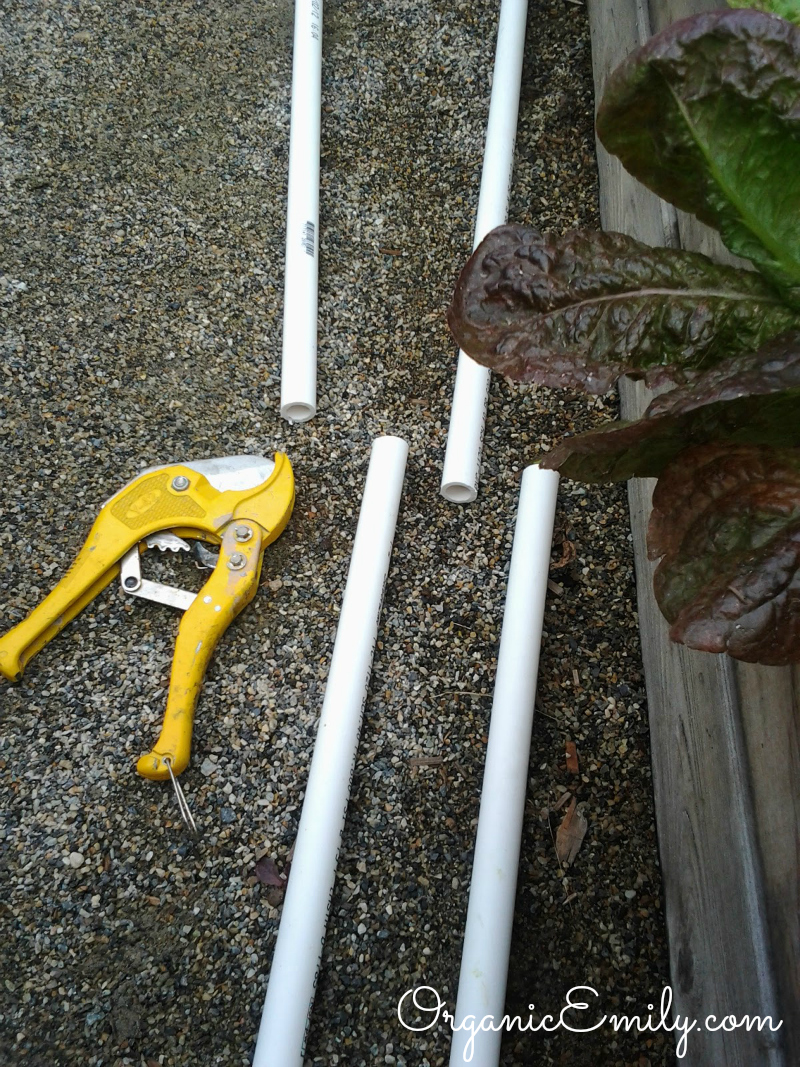
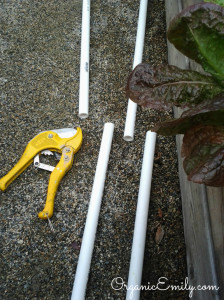
You will need 4 (10 foot) 1/2-inch pipes for 2 – 4×8 garden boxes.
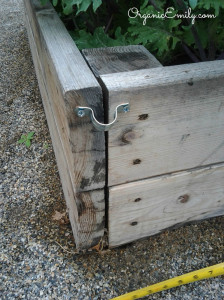
Hoop House 2

Loosely secure 6 metal brackets onto the grow box.   3 on each side, measuring evenly between all 6.
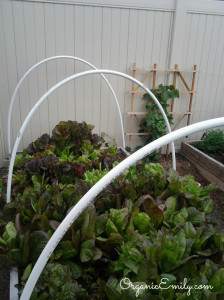
Hoop House 3

Slide the PVC pipes into place and secure the screws tightly.  If you put them together on a cooler day, try setting them out in the sun to warm them up so they are less likely to break.
Hoop House 4

Cut an additional pipe into 3 sections fitted and measured to be secured in between each hoop. Your measurements may be different from mine.
Hoop House 5

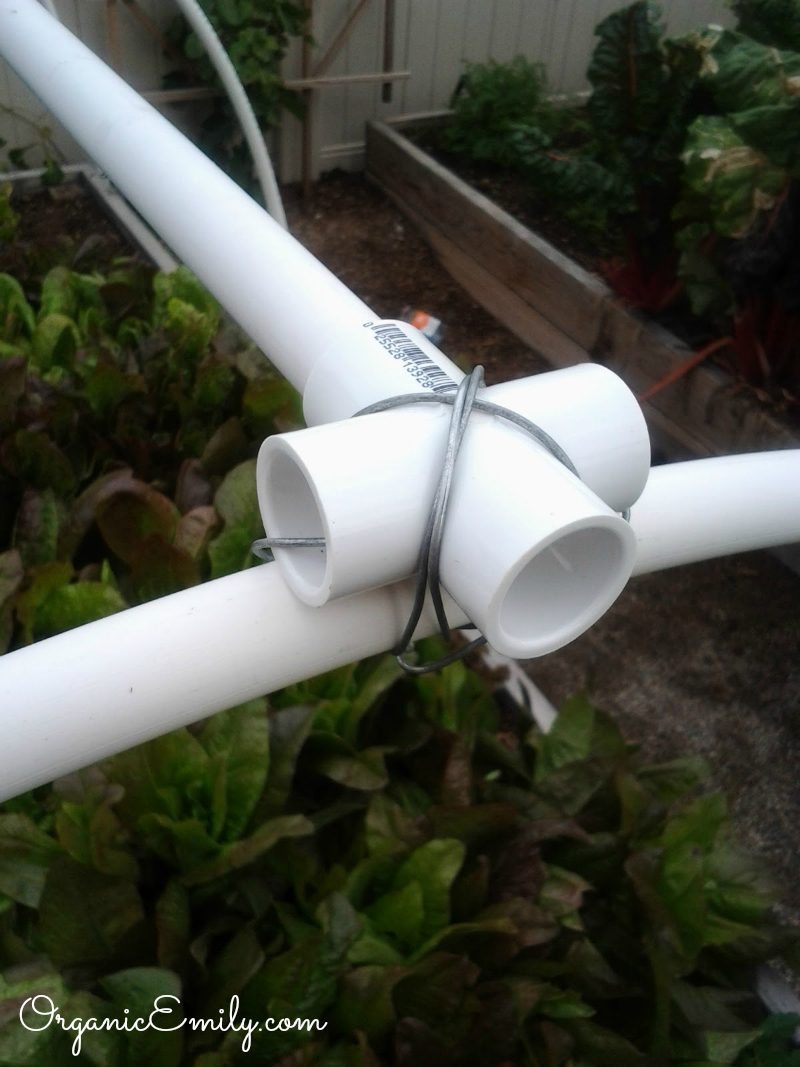
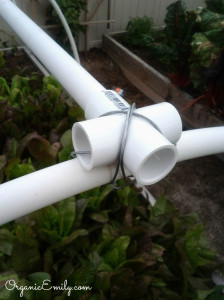
Fit the 1/2 inch pipe into a T and secure to hoop with heavy duty wire. Pipe must be cut to fit into the 3 T’s.
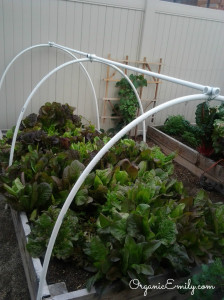
Hoop House 6

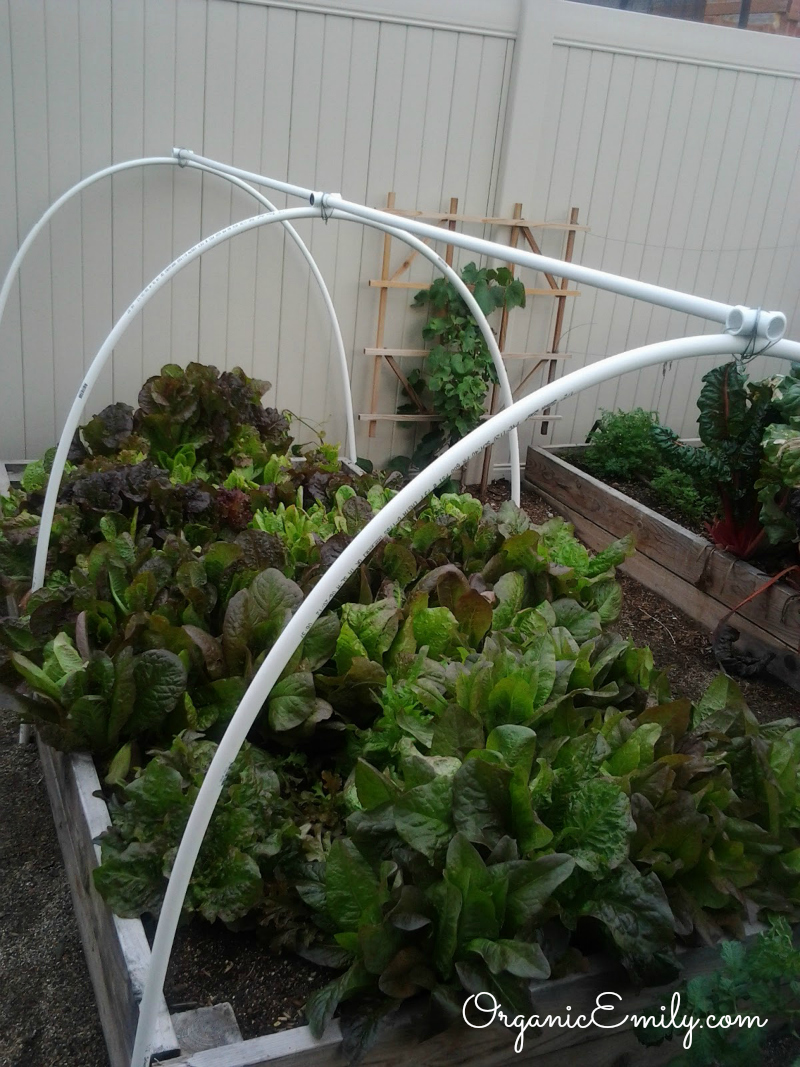
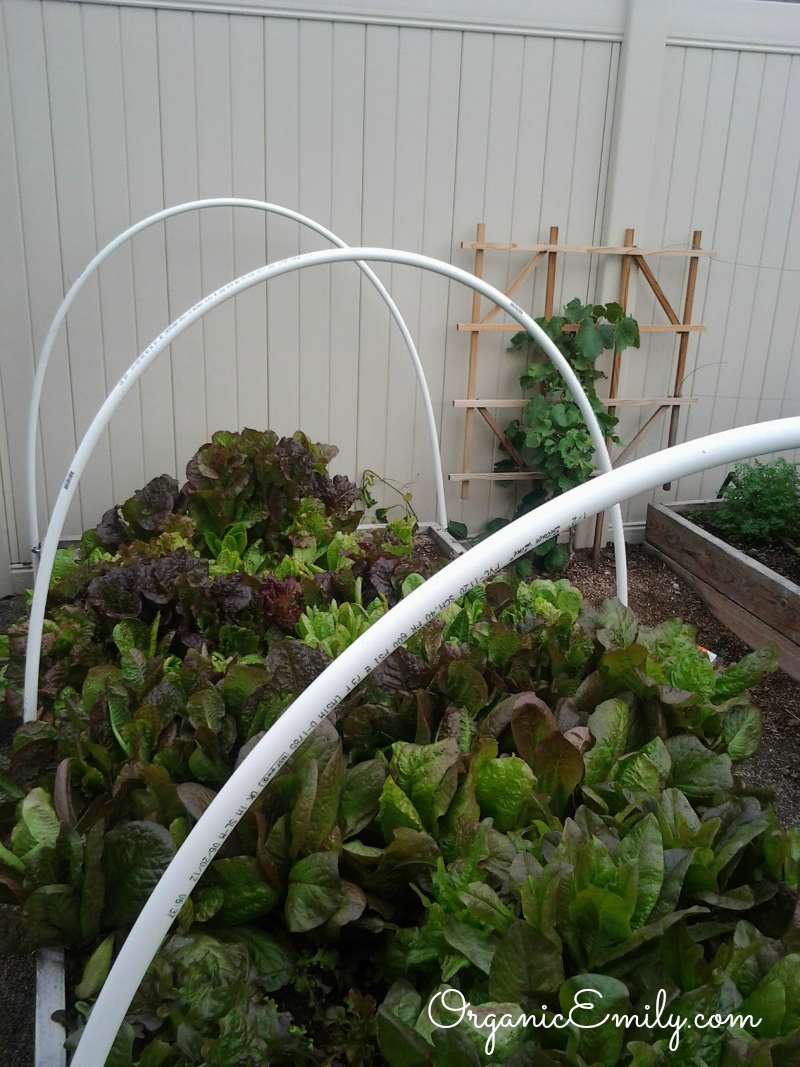
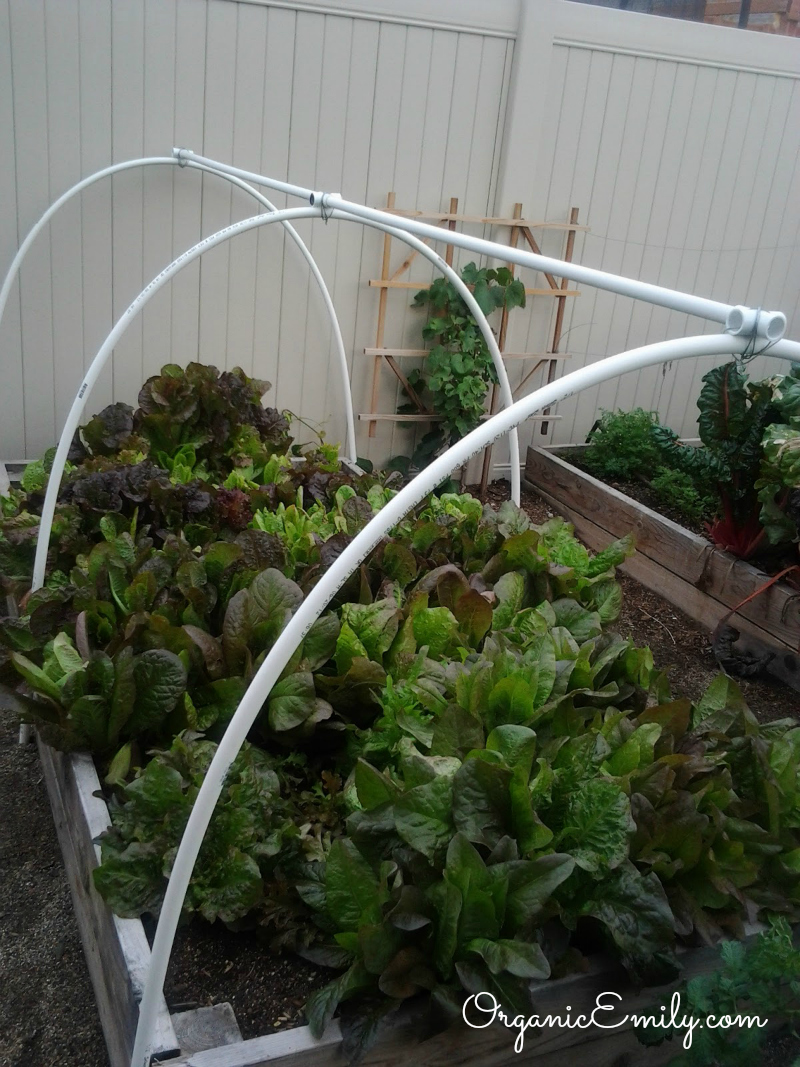
Frame is secured down and ready for use!
Hoop House 7

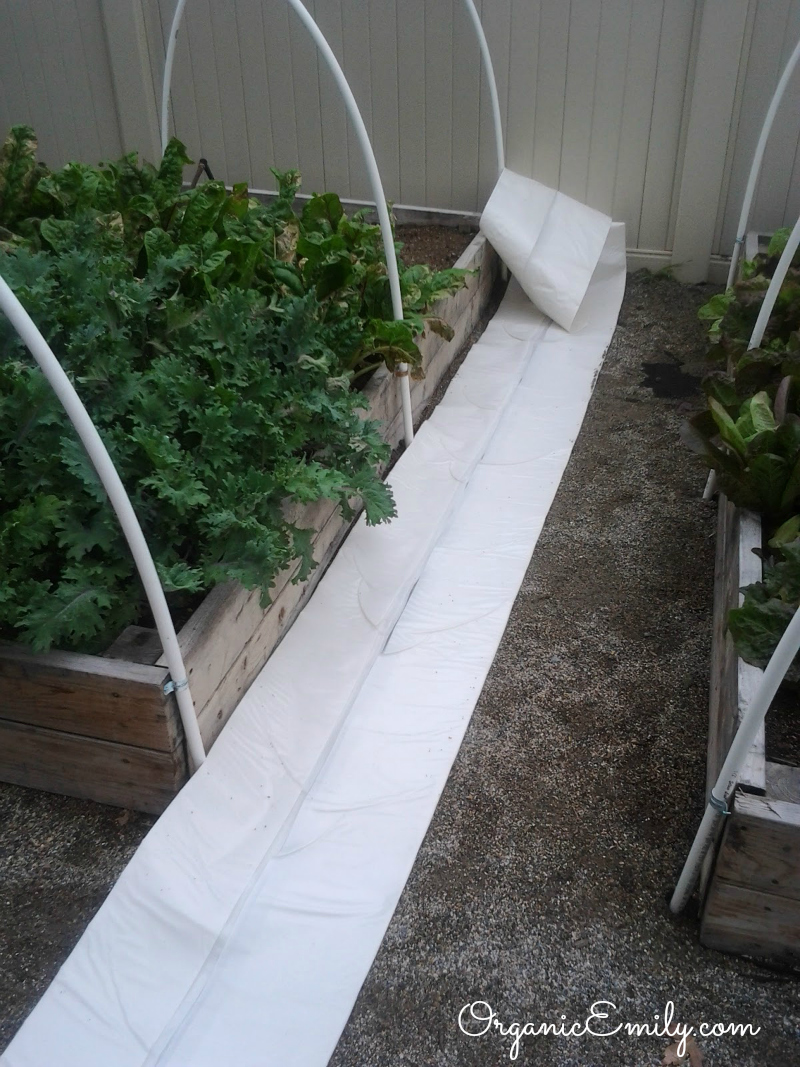
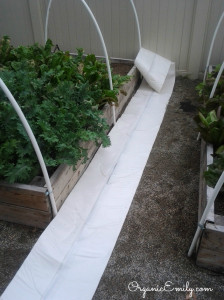
You will need the heaviest plastic you can find.  This is 6 ply.  If you can find 8 ply, that is even better.  Cut to fit the box so it hangs past the ground.
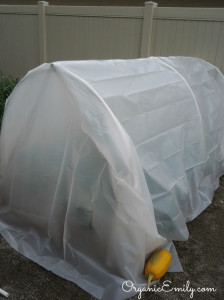
Hoop House 8

Secure with clamps or extra squash (just for demonstration :)…   Be sure to check the weather and give the plants air to breath especially if it gets over 40`, they can cook!
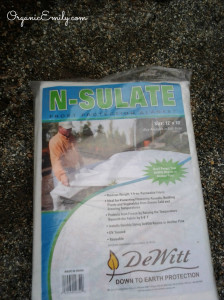
Hoop House 9

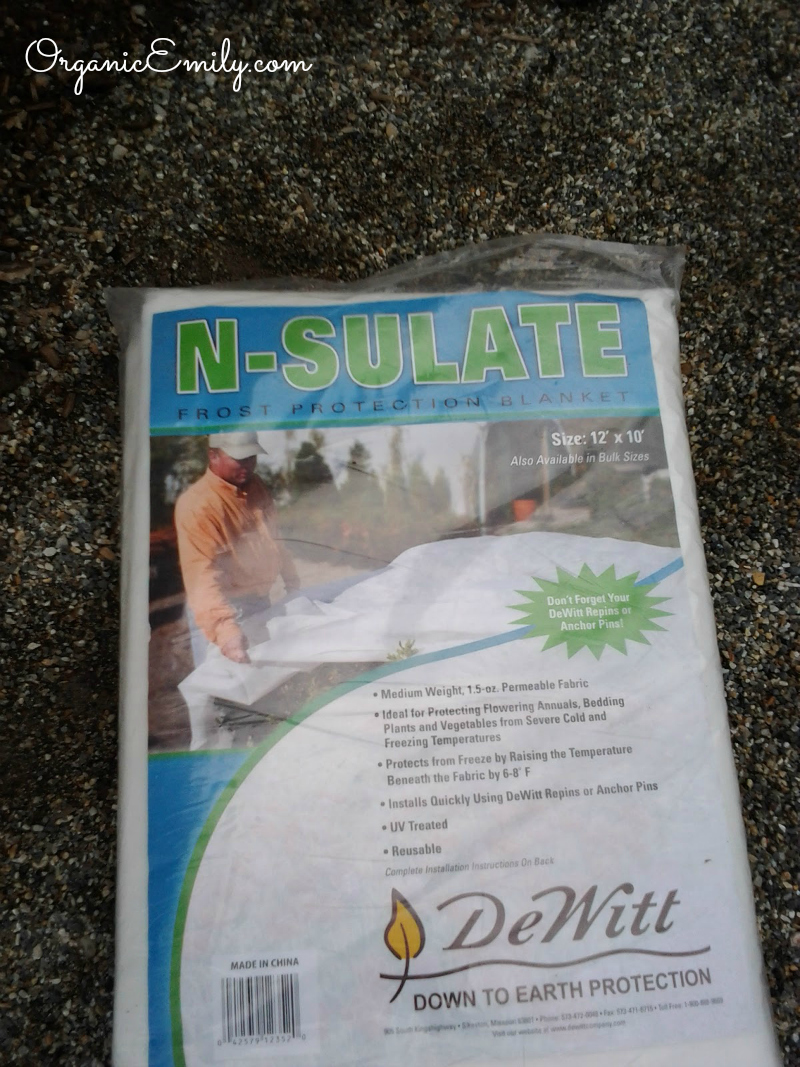
For an additional 8 degrees of protection you can use fabric row cover.  I place this over my crops and then put the plastic over the hoops.  I purchase mine at Steve Reagan (500w and about 3900s in Salt Lake City).  The last time you will water is about mid-November.  Be sure to harvest out of your “cold storage” when the temps are above 32 degrees in the winter if they are still going strong (it depends on where your garden boxes are placed in the yard).  South-facing protected area up against a fence or building is best.  For more information on year-round gardening check out one of my favorite books called “The Year-Round Gardener” by Nikki Jabbour.

Homemade Ice Cream Sandwiches

Homemade Ice Cream Sandwiches

These cookies are good enough by themselves but with a little vanilla ice cream sandwiched in between two, you’ll be sure to cool off in the summer heat!

Recipe

1/2 lb. butter (2 sticks), at room temperature

1 cup organic granulated sugar

1 cup brown sugar

2 teaspoons pure vanilla extract

2 extra-large eggs

2/3 cup unsweetened cocoa (dutch processed is a good choice)

2 cups all-purpose flour

1 teaspoon baking soda

1 teaspoon sea salt

2 cups semisweet chocolate chips

Preheat the oven to 350 degrees.  Cream butter and sugars until light and fluffy.  Add the vanilla and eggs.  Add the cocoa and mix again.  In a small bowl mix together the flour, soda and salt.  Add the flour mixture and mix until just combined.  Fold in chocolate chips.

Drop 2 tablespoons of dough onto baking sheets that have been prepared with parchment paper.  Flatten the dough slightly with your hands and bake for 15 minutes.  Remove from oven and let cool slightly on the pan, then transfer to a wire rack to cool completely.


Saving “Dry” Seeds

Head of Lettuce Flowering and Going to Seed

Saving dry seeds is actually very simple.  “Dry” seeds are plants that produce seeds from a blossom and then mature inside the flower or pod produced from the flower.  These seeds ripen on the plant and do not need any special treatment other than keeping them cool and dry for storage.  I recently did a post on how to save onion seeds, https://rootedemily.com/?p=358.  This is similar to that, but just wanted to show more pictures on “how to” with other vegetables.  The picture above shows a head of lettuce that has gone to seed.  You can see the top flowering.  Let’s take a closer look.

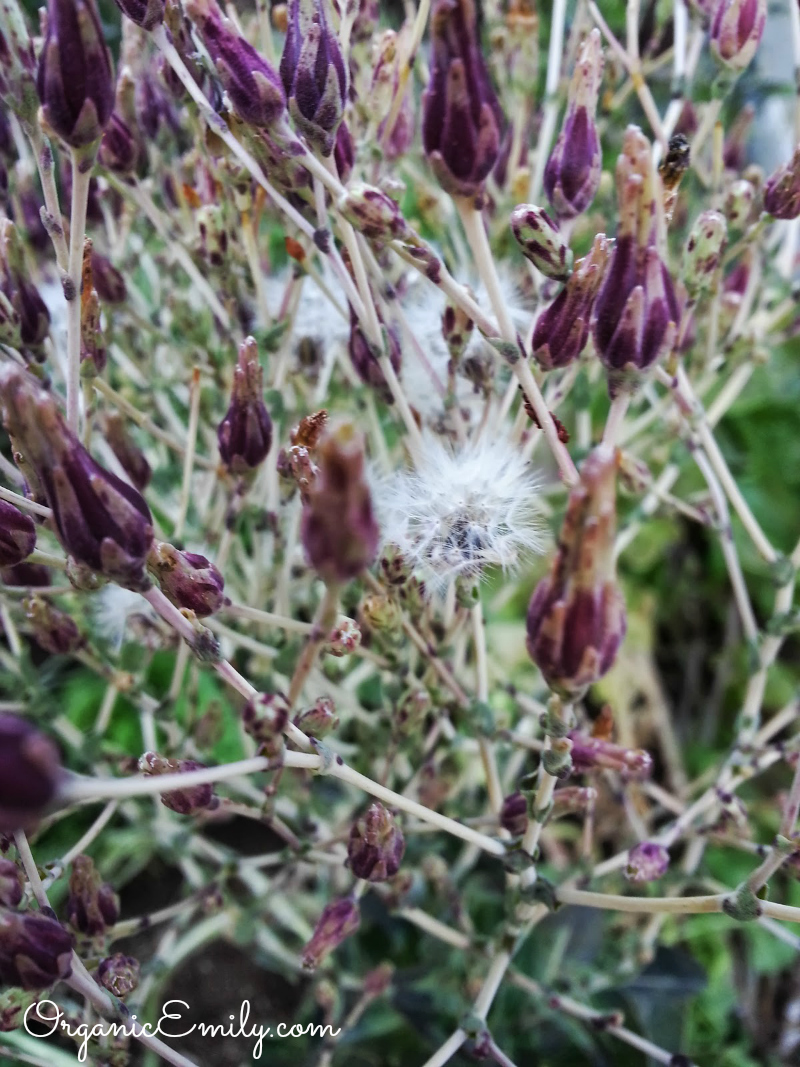
Seeds in Fuzzy Flower Head

In this picture you can see the flowers in a little more detail.  The ones that look fuzzy are an indication that the seeds inside are ready to harvest!  Notice they are similar to dandelion flowers going to seed.

Pulling Seeds Out of Flower Head

Simply pinch and pull the fuzzy flower off the stem and at the bottom you will see little seeds.

Available Seeds from Lettuce

Here they are!  These little babies can be planted now during the first 20 days of August or they can be saved for next spring.  Be sure to save them in a moisture free velum or parchment envelope.  I get my envelopes from www.dianeseeds.com

Brocolli Seed Pods on Plant

Can you guess what plant this is?  It’s one head of Walthom broccoli I let go to seed.  Notice the plant looks dry and dead.  This is what you want when harvesting  these dry seeds.  The head of broccoli produces flowers that produces pods.  This is the case for all cruciferous plants including kale, cauliflower and cabbage.

Brocolli Seed Pod

Here’s a closer look at all those pods!  That’s a lot of seed production from one plant!

Open Brocolli Seed Pod

Inside the pods are the seeds.  You can get up to 20 seeds in one pod depending on the size.

Saving Sweet Pea Seeds

The concept with saving peas is the same.  Allow the pod to get big and dry as paper!  Then harvest them for saving seed!

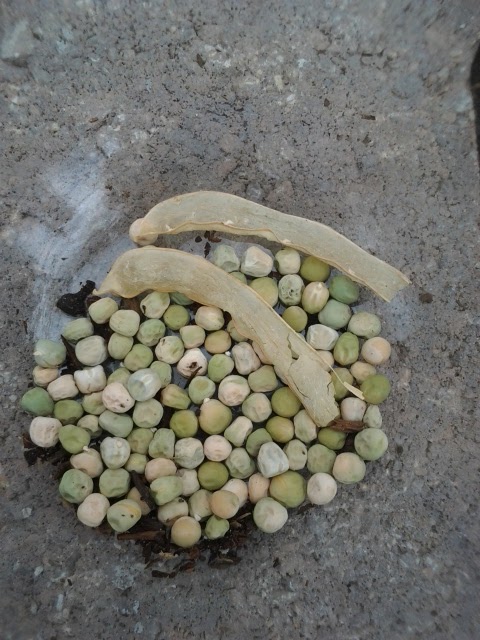
Shelled Sugar Pea Seeds

The seed pods should be easily opened.  You want to find very dry wrinkled seeds!  Save them in a cool dark place or plant them in the ground by July 20th for a fall crop.

There are many other crops that produce “dry” seed their first year like spinach, radishes, cilantro (best sown in fall and harvest seeds in early summer), and other herbs like dill and basil if allowed to go to seed.  Then there are plants that produce seed their second year.  These plants are considered biannual.  They include parsley, carrots, kale, Swiss chard, onions, beets and other root vegetables.  Leave those in the ground for a second year and they will produce seed.

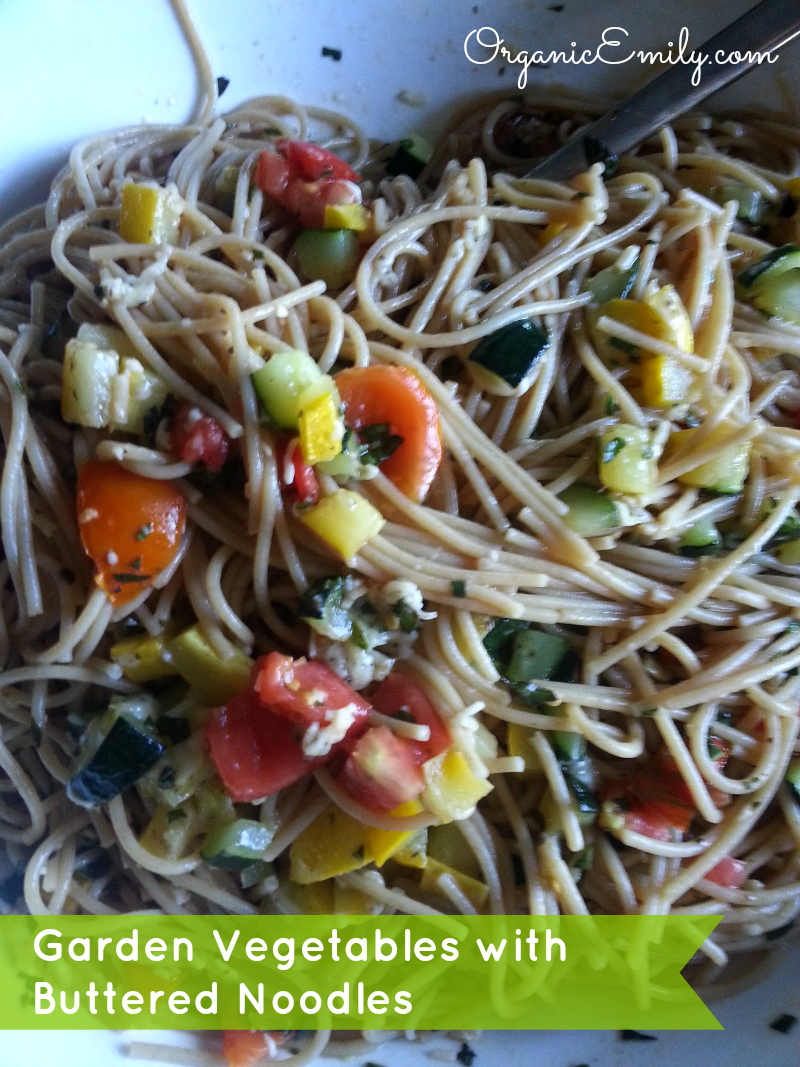
Garden Vegetables with Buttered Noodles

Garden Vegetables with Buttered Noodles

I love this recipe because it’s fast and delicious!  There are many summer days I’d rather be outside in my garden than cooking dinner for an hour or longer.  My kids loved it too!

Recipe

1 package of whole wheat spaghetti noodles, cooked and drained

While the noodles are cooking prepare the vegetables

1-2 pounds chopped tomatoes, set aside

1/2 – 1 cup chopped fresh basil, set aside

1 small zucchini, chopped

1 small yellow summer squash, chopped

1/2 – 1 cup Parmesan cheese

In a large skillet heat 1 tablespoon olive oil and 1 tablespoon butter.  Add the squash and zucchini and cook until lightly browned.  Add 1/4 cup of Parmesan cheese to the squash and pull off the heat.  In a large bowl, add hot noodles tomatoes, basil, squash mixture,  the rest of the Parmesan and another tablespoon of both olive oil and butter.  Add salt and pepper if needed and enjoy!

August 2013 Honey Harvest

Brushing Bees off Frames 2

I pretty much had 20 frames full of honey earlier this week when I checked on my girls!  Which by the way is super awesome!!!  I intended to buy another honey super (box) and frames to give more room for the bees to work on, but the woman at the bee store encouraged me to extract the honey instead and let them work on the same frames again increasing my honey harvest so I can pull more out in September.  They literally filled the top 10 frames in one month!  We’ll see what we get in another month and a half… I love beekeeping!

The process of extracting honey is just plain good old fashioned (fun) hard work!  I had help from my mom and a friend this year.  Those frames of honey can weigh 10 pounds each and with 10 frames in a box, well, I was grateful for the help!  Here are the basics of extracting honey.

Smoking Bees

The first step is to get all the equipment ready that is needed, including a smoker!  I light mine with burlap and small wood chips.  This produces a “cool” smoke.  It distracts the bees into thinking there is a fire so they gorge on honey and get ready to leave the hive.  Of course we aren’t there that long so they don’t fly away.  A few puffs at the entrances and the opening and they didn’t even know we were there… for the first part anyway.

!st Frame is always most difficult to get out

Once the top came off I pried the frames apart stuck together with propolis.  Getting the first frame out is always the most difficult.  I wouldn’t be able to do it without my hive tool!

1st Frame Out

Pulling out the first frame full of honey!

Brushing Bees off Frames

Brushing the bees gently with my bee brush… this is when they realized we were there!  A little more smoke and they were okay!  I needed to get all the bees off each frame and put them into an empty box with a cover so we could extract the honey without any potential problems with bees.

Inside the Honey Super

Here is a small look inside the honey super.  You can see there are no bottoms to the boxes so they can go all the way up and down the entire hive working where needed.

Decapping Honey

Once all the top frames were pulled out and placed into an empty box with a pan on the bottom to catch any loose honey we went into my husbands workshop and pulled them out one by one to remove any honey that had been capped with a hot capping knife.

Extracting Honey 2

The extractor is a large barrel that fits 3-4 frames in it and spins the honey to the outside.  It’s important to do this on a warm sunny day so the honey comes out easily.  This is a hand held crank so it took  quite a bit of muscle to get the job done.  Thanks to my mom, she did most of the hard work!

Extracting Honey 1

My sweet friend Angela helped this morning!  Couldn’t have done it without them!  They definitely took honey home with them!

Straining Honey

From the extractor we poured the honey into another spouted bucket lined with a small strainer net.  This caught any of the small pieces of wax and gave us beautiful smooth golden honey!

August 1st Honey Harvest 2013

We harvested a total of 22.5 pounds of natures medicine!  And we aren’t even finished yet!  Looking forward to doing it again soon!

Planting a Fall/Winter Crop

Seeds

If you think it’s too late to grow a garden this year, think again!  You can still plant cold crops and this month is the time to do it!  Cold crops are anything you planted in March and April like leafy greens and root vegetables.  Some of the seeds I just planted this week are from seed I have saved myself and others are from my local nursery.

Crops that can be planted August 1st-20th in Utah
Peas – plant July 20th
Chinese Cabbage
Broccoli (from starts)
Carrots
Spinach – September 1st
Kale
Lettuce (again)
Cabbage (from starts)
Swiss Chard
Turnips
Kohl Rabi
Beets
Parsley
Leeks
Green Onions
Radish – September 1st
Garlic – plant mid September
Cilantro
Dill
Any Perennial Herbs

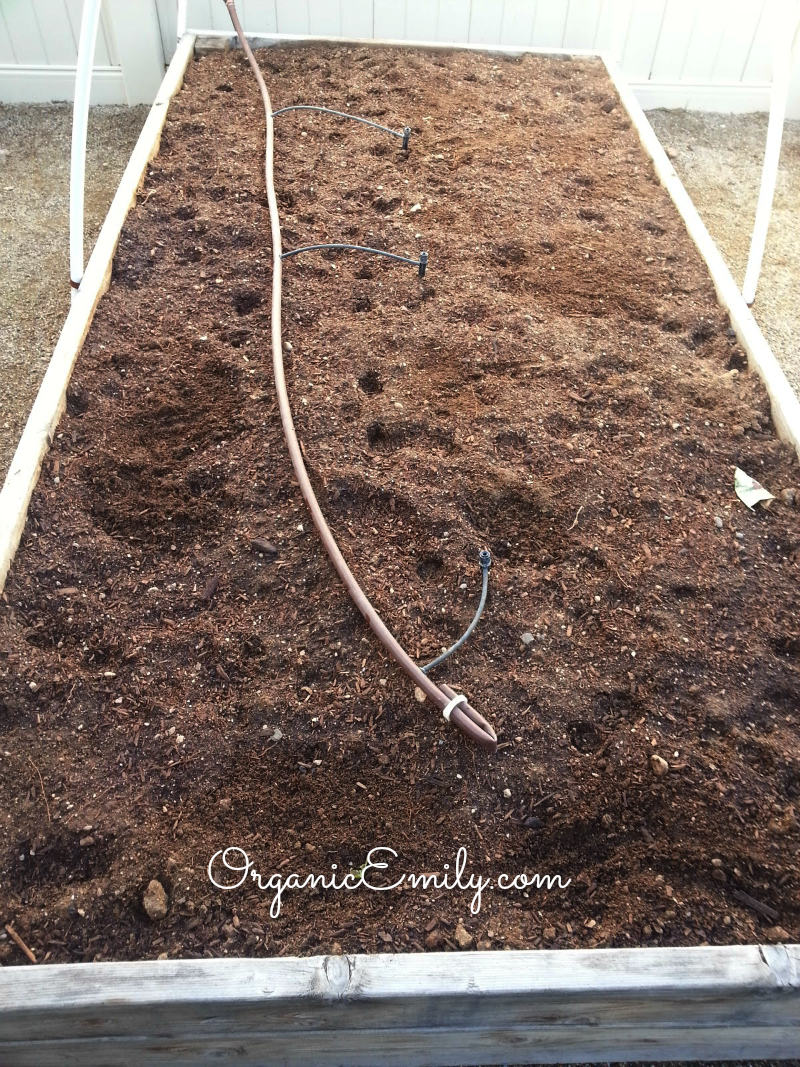
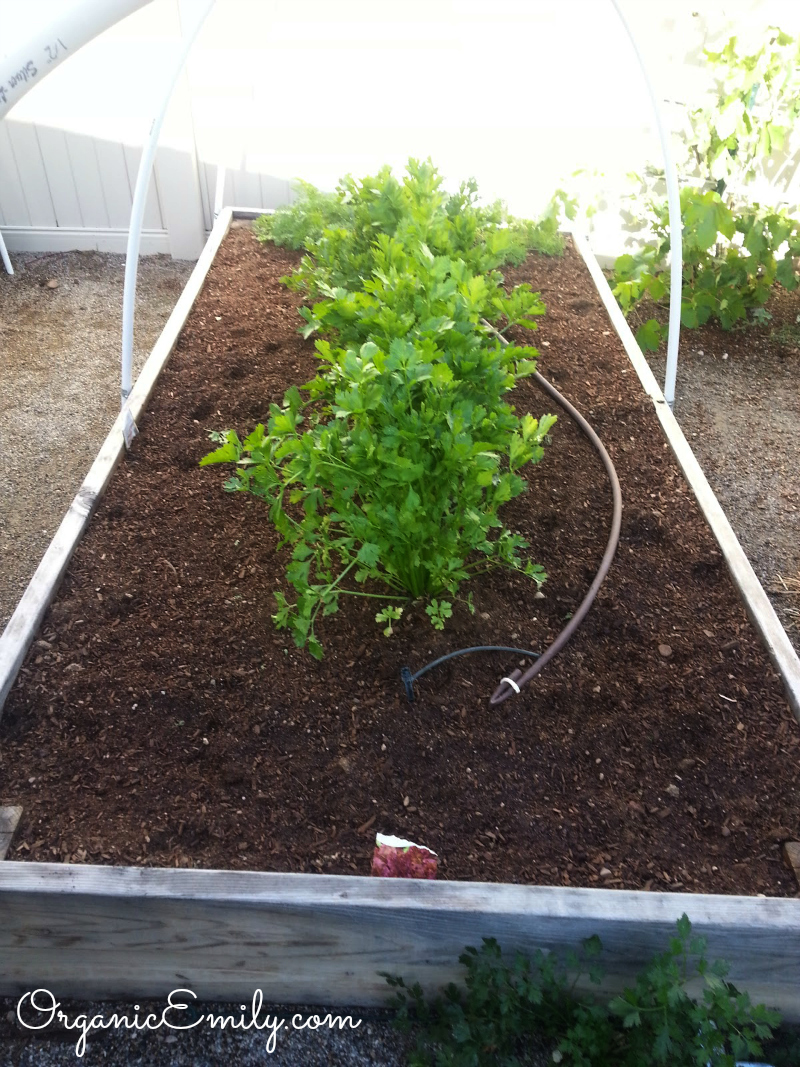
Prepared Garden Bed

Prepred Garden Bed 2

Here are a few of my beds I have prepared for fall planting.  In the first picture I had potatoes.  I harvested them all and then amended my soil with good organic compost and a granulated organic fertilizer.  I planted all my root veggies in the first box like rutabaga, turnips, carrots, beets and some Swiss chard (these are not part of the potato family so I’m good on rotating crops).

The second has celery in the center of the box I left from growing this spring.  It will last all through the fall if I protect it from frost.  I just harvested all my carrots and beets I grew around it and got it ready for planting.  Around the celery I planted 4 different kinds of lettuce, red leaf, butter head and a few loose leaf varieties.   In other boxes where my lettuce is going to seed I will plant my broccoli from starts growing in my basement.  I also have a place for spinach and kale too.  And of course I like to throw down lots of cilantro and dill seed all over as companion plants.

Be sure to look for my up coming post on how to make a Hoop Frame to keep those veggies going through the winter!

Crustless Garden Vegetable Quiche

Crustless Garen Vegetable Quiche

Summer is so wonderful for many reasons!  But one of my most favorite is that I get to make my fabulous rich and savory garden vegetable quiche!  Perfect for Sunday brunch or a weeknight dinner!  Use high quality ingredients and you will have a foolproof quiche everyone will rave over!

Fresh Ingredients from the Garden

I love when I can go outside in my own backyard and find all the vegetables I need to make something really wonderful!  Even the eggs were from my own backyard!  I love being self-reliant, even if it is on a smaller scale!


Recipe

10 large organic eggs
1 1/2 cups shredded sharp cheddar cheese
1 1/2 cups shredded Monterrey Jack cheese
1/2 cup low-fat milk
1 (16 ounce) carton of cottage cheese
1/2 cup flour
1 teaspoon baking powder
1/2 teaspoon salt
1/2 cup chopped parsley
Egg Mixture for Quiche
Whisk eggs, 3/4 cup cheddar, 3/4 cup Monterrey cheese, milk, cottage cheese, flour, baking powder, salt and parsley in a large bowl.
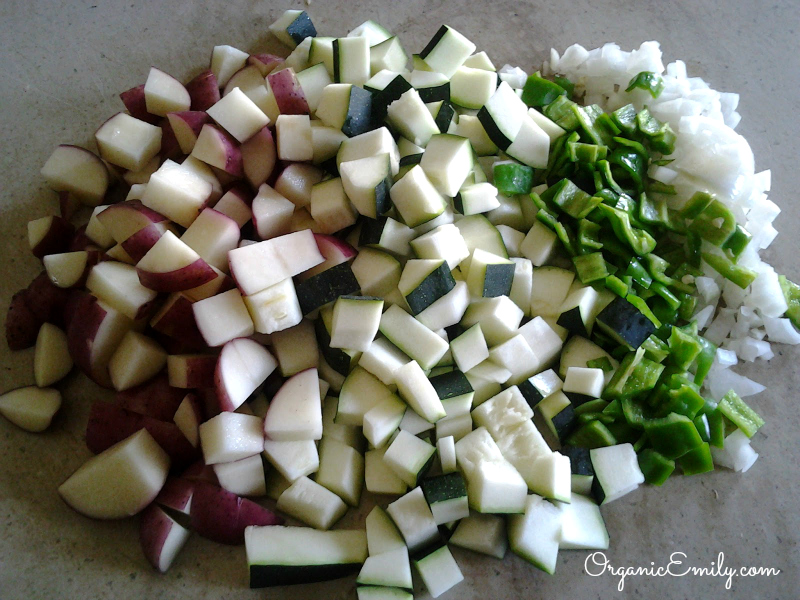
Chopped Fresh Vegetables for Quiche

4 cups zucchini, chopped

2 cups organic red potato, chopped
1 cup green peppers, chopped (sweet or medium spice)
1 cup onions, chopped
1 cup mushrooms chopped (optional)
salt and pepper to taste
Saute Garden Vegetables for Quiche
Saute vegetables in a 12-inch oven safe skillet with some organic canola oil, until softened, 5-10 minutes.
Ready to Bake Quiche
Pour the egg mixture over the softened vegetables, top with the remaining cheese and freshly sliced tomatoes.  Place in a 400` oven and bake for 15 minutes.  Turn the oven down to 350` and bake for an additional 35 minutes until lightly browned and set.  Serves 10.

Falafel with Tomato, Red Onion and Cucumber Salsa

Falafel with Tomato, Red Onion and Cucumber Salsa

Harvesting from the garden can be so much fun! But what to do with it all!  This simple vegetarian  recipe is light and delicious and uses lots of veggies and herbs!   Serve with tzatziki and pitas.  I got this recipe from one of my favorite cookbooks “Spilling the Beans”.

Recipe

2 cups (19-ounce) can drained chickpeas

1 small onion chopped

2-4 garlic cloves, peeled

2 Tbsps. chopped parsley

2 Tbsps. chopped cilantro

1 tsp. ground cumin

1/4 tsp. sea salt

pinch of dried red chili flakes

1/4 cup whole wheat flour

1 tsp. baking powder

Olive oil for frying

Pulse all ingredients together in a food processor except for the oil.  Form dough into small to medium size patties and heat oil on griddle.  Sear the patties and cook until golden brown on both sides.  Serve on pitas with tzatziki, chopped cucumber, red onion and tomatoes.

Tzatziki

1/2 cup greek yogurt

1 Tbsp. fresh chopped dill

1/2 lemon, juiced

salt and pepper to taste