Tabbouleh with Barley and Chickpeas

Tabbouleh with Barley and Chickpeas

This refreshing salad is light and savory!  Anytime you put a legume (bean) and grain together it makes a complete protein!  It’s perfect for an easy summer dinner side or main course!

Recipe

1/2 cup pearl barley

1 bunch parsley, chopped

1-2 cups chopped spinach

4 green onions, chopped

1/4 cup chopped mint

2 Roma tomatoes, chopped or 1 cup grape tomatoes sliced in half

1 can chickpeas, rinsed and drained

Dressing:

4 to 6 tablespoons fresh squeezed lemon juice

1/4 cup olive oil

1/4 tsp. sea salt

Freshly ground black pepper

Cook barley in 1 cup water in a rice cooker or on stove top.  In a large bowl mix all ingredients together.  In a small bowl mix all dressing ingredient together.  Once the barley is cooked place in large bowl with the other ingredients and drizzle dressing over top while still warm.  Serve and enjoy at room temp or cold.  Can be refrigerated for up to 2 days.

Patriotic Flag Berry Tart

Flag Berry Tart

Although the 4th has passed us by I still wanted to post one of my most favorite desserts!  It can be made in a round tart shell pan and served with a variety of fruit on top!  This beautiful and patriotic tart is so delicious with it’s secret chocolate bottom and creamy filling, you think you’d died and gone to heaven!

Recipe

For the crust:

2 1/2 cups all-purpose flour

1/4 cup sugar

1/4 teaspoon salt

1 cup (2 sticks) butter, cold and cubed

2 large egg yolks

2-4 tablespoons cold heavy cream or ice water

Pulse flour , sugar and salt in a food processor until combined.  Add the butter, and pulse just until mixture resembles coarse meal.  Add yolks and drizzle 2 tablespoons cream evenly over mixture; pulse just until dough begins to come together, no more than 30 seconds.  If dough is too dry, add remaining cream, 1 tablespoon at a time, and pulse.  Divide dough in half, pat each half into a disk, and wrap in plastic.  Refrigerate 1 hour or up to 2 days, or freeze up to 3 months (thaw in refrigerator before using).

On a lightly floured surface, roll out 1 disk of dough into an 18-by-18-inch rectangle, 1/8-inch thick.  Roll out a round if using a round pan.  Fit dough into a 14-by-4-inch fluted tart pan; trim excess dough flush with rim.  Pierce bottom of shell all over with a fork.  Refrigerate or freeze until firm, about 30 minutes.  Repeat with second disk of dough.


For Filling and Topping:

8 ounces cream cheese at room temperature

1/2 teaspoon vanilla extract

1/2 cup powdered sugar

1 cup whipping cream

4 ounces semi-sweet chocolate chips

Fresh berries and chopped fruit (blue berries and raspberries for the flag)

Preheat the oven to 375 degrees.  Place pans on a rimmed baking sheet.  Line shells with parchment or foil, leaving a 2-inch overhang.  Fill shells with pie weights or dried beans.  Bake until edges are just starting to color, about 25 minutes.  Remove parchment and weights; continue baking until crusts are dry and evenly browned, 10-15 minutes more.  Transfer to wire rack; Place the 4 ounces of chocolate on the bottom of the warm tart shells and allow to sit for a few minutes.  Spread evenly over bottom and allow to completely cool before taking the tarts out of the molds.

Beat the whip cream, vanilla and powdered sugar on high until the cream starts to form peaks.  Set aside.  Beat the cream cheese until smooth and fold in the cream mixture.  Smooth over the chocolate in the tarts.  Place berries according to your liking.  Enjoy!


Coconut Curry with Garden Vegetables and Chicken

Coconut Curry with Veggies and Chicken

This was my own spin on a recipe I saw in a magazine.  This hearty meal is packed with fresh herbs and veggies from the garden.  It was very simple and so delicious!  Make it vegetarian and leave out the chicken if you want too!  Veggies from my garden: zucchini, onion, peas (frozen), carrots, potatoes, peppers and basil and chives.

Recipe

1-2 tablespoons olive oil

1 yellow onion, chopped

1 red bell pepper, chopped

1 yellow bell pepper, chopped

3 whole carrots, chopped

3-4 Yukon gold potatoes, chopped

1 medium zucchini, chopped

1 cup fresh sugar snap peas chopped or you can use frozen petite peas too

2 teaspoons curry powder

1/2 teaspoon tumeric

salt and pepper to taste

2 cans light coconut milk

1/2 cup fresh chopped Thai Basil

1/4 cup fresh chopped Chives

Rotisserie chicken, meat removed and cubed


Add the oil, chopped onion, carrots, peppers and potatoes to a large dutch oven and cook for about 10 minutes, stirring occasionally.  Add the peas and zucchini and seasonings.  Cook for a few more minutes and then add the coconut milk.  Bring to a boil and then turn the heat down to medium low.  Allow to simmer until potatoes and carrots are soft, about 10-15 minutes.   Add the chicken until heated through if using.  Turn heat off and add the herbs.  Serve over cooked brown rice.


Clay Stamped Garden Markers

Clay garden markers 5

Here’s a project you can do with your kids!  Mine loved rolling the clay and stamping the letters!  These darling garden markers are reusable and weather proof because the words are stamped into the soft clay before placing them into the oven to dry.  Plan on making 18-20 garden markers with a 1lb. package of polymer clay.  We used our metal stampers from our Spoon Garden Marker project, but you can also use rubber stamps too!  The process is very simple!

You will need:

1lb. Polymer clay

Knife

Rolling pin

Metal or Rubber stamps

Jelly roll pan lined with parchment paper

275 degree oven

Clay garden markers 1

Cut the clay to make 1 inch clay balls.  Roll the balls into 5 inch logs.

Clay garden markers 2

Roll the log flat at a 1/4 inch thickness.  Cut the bottom at an angle for the marker to easily penetrate the soil.

Clay garden markers 3

Stamp the clay with metal or rubber stampers with what you plan on growing!

Clay garden markers 4

Place the soft clay markers on a jelly roll pan lined with parchment paper.  Bake at 275 degrees for 15 minutes or until the clay stiffens.  Let cool and place where needed!

Growing and Using Medicinal Herbs: Lavender

Lavender Plant

I love lavender!  It serves so many purposes both in the garden and home!  Lavender is easy to grow, beautiful, aromatic and attracts honey bees and other beneficial insects into the garden.  It is a sun loving, drought tolerant perennial and grows best in well draining soil.   Look for babies that come up every year and replant them in areas they can fill in.   You can also divide the root ball once the bush is large enough at about 3 years old.  Most types of lavender are medicinal.  Highly regarded varieties are L. officinalis and L. angustifolia.

In the home I use it with chamomile and lemon balm to make a relaxing tea or infuse a cup of lavender tea into fresh lemonade!  Lavender icing on sweet sugar cookies is quite a gourmet treat too!  It’s easy to make an infused calming lavender massage oil and headache tincture.  I’ll show you how later in the post.

Harvesting Lavender

Harvested Lavender

This week I have been harvesting my lavender buds just before they bloom into full flower.  If you harvest the flowers when they are in full bloom the medicinal properties won’t be as strong or last as long.  Dry your flower buds in a basket under the shade of a tree, or hung upside down in a cool dry room in the house or in a dehydrator on the lowest setting at around 95 degrees or lower.

Laveder Jar

Once the buds are completely dry, remove them from their stems and place in a glass jar with a lid.  Lavender has profound calming and uplifting effects.  It has been used as a mild anti-depressant for many years.  It’s also great for tension headaches and insomnia.  I always have a bottle of lavender essential oil around to use as an antiseptic.  It’s antibacterial and antifungal properties helps to keep scrapes and burns clean and free from infection.  Essential oil from the lavender plant has been known as the “First Aid in a Bottle” because it is so versatile!  It’s ability to take the sting out of a bee sting or other insect bites is unbeatable!  It even helps take the pain out of burns and cuts.  Try a few of these fabulous recipes from my favorite book by Rosemary Gladstar, “Medicinal Herbs, A Beginners Guide”.

Calming and Antiseptic Lavender Spray

This recipe is simple, extremely versatile and safe for everyone!

7 tablespoons purified water

1 tablespoon witch hazel extract

10 drops lavender essential oil

1 (4 ounce) spritzer bottle

Place all ingredients into the bottle and shake well before using.  You can use it to mist bedsheets, a car or other rooms in the house.  I like to spray it on cuts and scrapes as an antiseptic.  It’s also great for spraying on public door nobs or on hands as a cleaner.

Lavender-Feverfew  Migraine and Headache Tincture

1 part lavender buds

1 part feverfew leaf and flower

80-proof alcohol, unpasteurized apple cider vinegar or glycerin

Place the herbs in a quart jar and cover with alcohol by an inch.  Place on counter for 3-4 weeks in a visible place and shake every day.  Strain with cheese cloth and keep in a dark blue or amber bottle out direct sunlight.

To Use:

For long term use for migraine headaches, take 1/2 teaspoon 2x a day for up to 3 months.  Discontinue use for 3 to 4 weeks and them repeat the cycle.  For severe acute situations take 1/4 teaspoon every 20-30 minutes for up to 2 hours.  Do not use during menstruation because it can stimulate bleeding.


Calming Lavender Massage Oil

1 1/2 ounces dried lavender buds

4 ounces nut or seed oil (apricot, grapeseed or almond)

10 drops lavender essential oil

1 glass quart jar

Pour oil over lavender buds.  Cover with lid and let sit in a sunny warm spot for 2-3 weeks.  Strain the buds out of the oil and place in jar.  Add the essential oil and keep in a cool dry spot for up to 6 months.  Use in a bath or for massage.

DIY Garden Markers

Garden Marker Spoon 1

These durable garden markers were fun to make and not as hard as I thought they would be.  I saw this idea online and wanted to make them for my garden!  All it took was a few tools and a little muscle to pound the spoons flat.  Great for working out any aggression! 🙂  And I like that the words won’t wash off with time and weathering.

Supplies

Tools for Garden Marker Spoons

All you will need is:

  • Metal Stampers (I got mine off amazon for $15)
  • Old Spoons (second hand stores are great for this!)
  • Hammer
  • Permanent Marker (to fill in the stamped words)
  • Hard surface to hammer the spoons on ( I used an old paver)


Directions

  1. Hammer the spoons flat on a hard surface that won’t break.
  2. Stamp your spoons with the names of veggies and herbs you are growing in your garden with hammer.
  3. Color in the words with a permanent marker an wipe off leaving the words darkened and easier to see.
  4. Place in garden where needed!


Growing and Using Medicinal Herbs: Calendula

Calendula Plant

Growing Calendula

This bright and cheery flower is a hardy long standing bloomer and very easy to grow!  My calendula has even continued to bloom after the first few snow falls!  It grows best in rich fertile soil, but will grow in poor soil too.  The more you pick the red, orange or golden flowers the more the plant will produce!  I usually let a few go to seed so I can save them and replant them again in the spring.  However,theyt will self sow very easily.  When the blossoms are ready to pick they have a sticky resin on the petals which contain anti-fungal properties.  Pick the flowers when the leaves are still slightly upright.  Calendula flowers make a good companion plant for broccoli and squash families keeping the pests away and attracting beneficial insects.

Medicinal Uses

Calendula promotes cell repair and growth, healing wounds when made into ointments or salves.  The flower is noted as antiseptic and anti-inflammatory.  It can be used topically or internally as a tea to keep infections at bay.  It’s a wonderful herb for babies as it is soothing and gentle and used for diaper rash, cradle cap and many other skin irritations including sores, burns and bruises.  The tea can also be used for treating gastrointestinal problems such as ulcers, cramps, indigestion and diarrhea.  It is also known to be one of the best herbs for nourishing and cleansing the lymphatic system.  It works to assist with moving congestion out of the body along with regular exercise.  Calendula has a perfect safety record with no toxicity reported.


Picked Calendula Flowers

Calendula is best harvested and dried to use in teas and salves.  Pick the flowers just as they open on a dry sunny day, the resin will be stronger and will leave a sticky film on your fingers.  Allow the flower to dry in a basket under the shade of a tree, on your counter top over a paper towel or on the lowest setting of your dehydrator.   Once dried you can make your own solar infused calendula oil.  Also be sure to let some go to seed so you can grow them again next year.  Simply allow the flower head to completely dry before harvesting seeds.  Keep them in a cool dry place inside a velum or paper envelope.

Calendula Oil

Calendula Oil

To make calendula oil fill a glass jar 3/4 full of dried flowers.  Fill the jar with olive oil to cover the buds by an inch and cover with a lid.  Place in a sunny, warm spot and let the herbs infuse from the sun for 3-4 weeks.  For double strength strain the oil and fill the jar again with more buds and put the oil back in the jar.  Start the process over again for another 3-4 weeks.  Once finished strain a last time and keep in a cool, dark place.  It will keep for a year in the refrigerator.   It can be massaged topically to the skin or can be made into a salve.


Calendula Salve

1 cup calendula salve

1/4 cup beeswax, grated

4-6 drops lavender essential oil

Warm the oil and beeswax over a very low heat until melted.  Check for consistency by dipping a spoon in the salve and placing in the freezer for a few minutes to see how it sets up.  If you want a firmer salve add more beeswax.  If you want it softer, add more oil.  Add the lavender essential oil which adds an antibacterial, antifungal and antimicrobial properties to the salve.  Mix quickly and pour into small jars or tins.  Let cool, put the lids on and storein a dark cool place.

To Use

Apply salve generously to treat skin rashes, wounds, cuts, diaper rashes or cradle cap.

Growing and Using Herbs: Basil

    Sweet Basil

There are so many different kinds of basil to grow these days!  All beautiful and uniquely fragrant!  I grow lots of it!  In fact I grow it everywhere I can!  It’s even pretty enough to grow in flower beds, enhancing the aroma and keeping pests away!  I usually buy a few starts to get a head start on the harvest, but this year I started my own seeds under lights and grew more, directly sowing them into the ground as a border around some of my vegetable beds.  I am now harvesting from my larger plants, throwing it into green salads, pastas and making fresh pesto (see recipe below)!  Basil is a sun loving, tender annual herb and needs to be planted by starts or seeds after the danger of frost has past.  Usually around the middle of May.  Be sure to cut the flowers off so the plant doesn’t go to seed extending the leaf growth all season long!

There are many health benefits to basil some include protection from certain cancers because of it’s high levels of flavonoids and anti-oxidants, protecting our body from free radical damage and cholesterol.  Basil is also an excellent source of magnesium, improving blood flow, and promoting cardiovascular health and well being.  Essential oils found in basil have long been effective as organic alternatives in treating dry skin, acne, psoriasis and even ear infections.  Basil’s not just an herb to sprinkle on spaghetti, basil has important antibacterial properties. When applied to the skin or surfaces, basil fights back against bacteria and so much more.   Not just any old herb, basil’s got anti-inflamatory properties second-to-none that can provide much-needed relief from all kinds of conditions, including inflammatory bowel disease (IBD) conditions. Basis is also reportedly helpful in treating constipation, indigestion, stomach cramps, and more.

Harvesting Basil

Cut Basil

When harvesting basil cut 1/4 of an inch above the first or second main stem where it begins to branch out.  This will force the outside stems to grow bigger, allowing for more harvest later!  Be sure to not cut off anymore than a 1/3 of the plant to allow enough energy to keep the plant alive.  Cutting basil on a regular basis will help encourage more growth!

Other varieties I grow in my garden!

Tai BasilCinnamon BasilLemon BasilSweet Basil

Fresh Basil Pesto

Basil Pesto

Freshly made basil pesto is a little piece of heaven in my kitchen!  The fragrance and flavor are hard to beat and only seasonal which makes it even more beloved!  This simple recipe is perfect for so many different kinds of recipes!  Try putting it on pasta, pizza, bruschetta, tomatoes, other veggies, sandwiches and crackers.  There are endless possibilities!


Recipe

 In a food processor blend 1 cup almonds or other desired nut.  I prefer almonds because they are mild in flavor and less expensive than pine nuts.

While processor is going add 4 cups packed fresh basil leaves

Add 1 cup olive oil to keep the mixture from sticking.
Add 2-4 cloves garlic
1 cup good Parmesan cheese
Juice of 2 lemons
Sea salt and pepper to taste.
If you like your pesto a thinner consistency, add more olive oil.


Summer Fruit Crostata

Summer Plum , Peach and Berry Tart

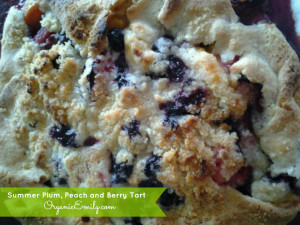
This recipe is worth making at least a few times during the summer!  I love that I don’t have to worry about forming the crust into a particular shape.  It’s pretty the way it’s folded over the fruit giving it a rustic natural look.  The hint of orange zest with a butter strudel and stone fruit is just heavenly!  This recipe is from Barefoot Contessa’s cookbook “At Home”.

Recipe

For the pastry (makes 2 crostatas)

2 cups all-purpose flour

1/4 cup organic sugar

1/2 sea salt

2 sticks butter cold and diced

6 tablespoons ice water

For the filling (makes 1 crostata)

1 pound firm ripe peaches, peeled and sliced

1/2 pound firm, ripe black plums, unpeeled and sliced

1/2 pint blueberries

1 tablespoon all-purpose flour

1 tablespoon organic sugar

1/4 teaspoon orange zest

2 tablespoons orange juice

For the topping (makes 1 crostata)

1/4 cup all-purpose flour

1/4 cup organic sugar

1/2 stick butter, diced

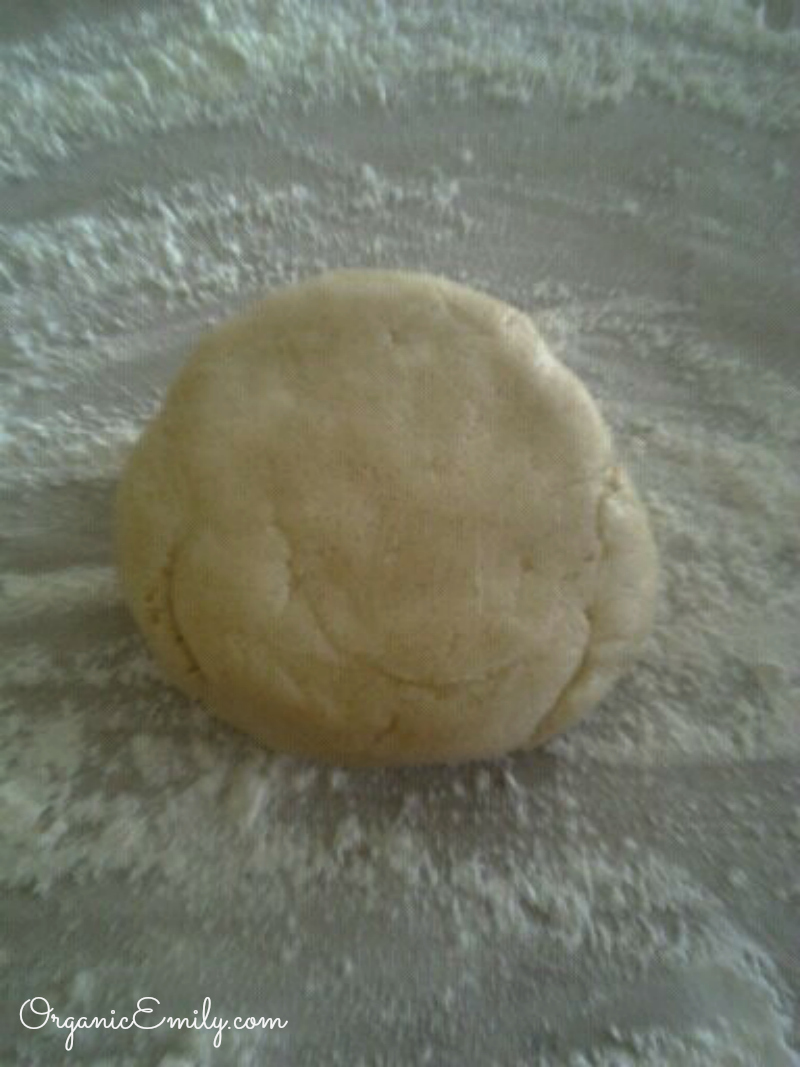
For the pastry, place flour, sugar, and slat in the bowl of a food processor fitted with a steel blade.  Pulse a few times to combine.  Add the butter and toss quickly with your fingers.  Pulse 12 to 15 times, or until the butter is the size of peas.  With the motor running, add the ice water all at once through the feed tube.  Keep hitting the pulse button to combine, but stop the machine just before the dough comes together.  Turn the dough out onto a well-floured board, roll it into a ball, cut in half, and form into 2 flat disks.  Wrap the disks in plastic and refrigerate for at least and hour.  If you only need one dough, freeze the second disk.

Preheat oven to 450 degrees.  Line a sheet pan with parchment paper.


Rustic Plum Tart dough

Roll the pastry into an 11-inch circle on a lightly floured surface.  Transfer it to the sheet pan.


Rustic Plum Tart 1

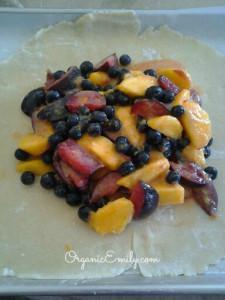
For the filling, cut the peaches and plums in wedges and place them in a bowl with the blueberries.  Toss them with 1 tablespoon flour, 1 tablespoon sugar, the orange zest and orange juice.  Place the mixed fruit on the dough circle, leaving a 1 1/2-inch border.


Rustic Plum Tart 2

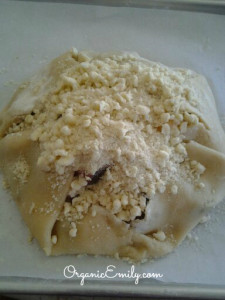
For the topping, combine the 1/4 cup flour, 1/4 cup sugar and 1/2 stick butter in the bowl of a food processor fitted with a steel blade.  Pulse until the mixture is crumbly.  Pout into a bowl and rub it with your fingers until it starts to hold together.  Sprinkle evenly over fruit.  Gently fold the border of the pastry over the fruit, pleating it to make an edge.

Bake the crostata for 20 to 25 minutes, until the crust is golden and the fruit is tender.  Let the crostata cool for 5 minutes, then use 2 large spatulas to transfer it to a wire rack.  Serve warm or at room temperature.


Spaghetti with Sweet Corn Basil Relish

Spaghetti with Sweet Corn Basil Relish

Recipe

I modified this recipe and made it my own by adding a bit more sweetness to the dressing and basil from the garden!  It’s perfect for summer, not to heavy, but filling for a vegetarian main dish!

1 package of whole wheat spaghetti, cooked

4 fresh organic corn ears, husked with kernels removed (sliced off ear)

1 can mixed beans, drained and rinsed

1 small cucumber, diced

1 small onion, finely chopped

2 stalks celery, finely chopped

1 large sweet red bell pepper, chopped

1/2 cup fresh chopped basil

1/3 cup apple cider vinegar

1/3 cup olive oil

2 tablespoons organic sugar, agave or honey

1/2 teaspoon sea salt

1/2 teaspoon dry mustard or 1 teaspoon fresh Dijon mustard

1/2 teaspoon celery seeds

Mix corn, cucumber, onion, celery, pepper and basil in a large bowl.  In a small bowl whisk together apple cider vinegar, olive oil, sugar, salt, mustard and celery seeds.  Add the pasta to the bowl and drizzle dressing.  Toss until lightly covered and serve or refrigerate for up to a day.