Benefits of Kale
Kale is something new I have been growing in my garden for the past few years. If you are like me I knew it was good to eat, but I just didn’t know what to do with it! Kale is one of the best greens we can add to our diet and when prepared properly it can taste really good! Here are a few reasons to eat kale!
- Kale is high in vitamins K, A and C giving our immune system a boost and metabolism high.
- It’s is high in fiber, keeping our digestive track healthy and clean and LDL cholesterol levels low.
- It’s high in iron and antioxidants increasing the bodies ability to fight off cancer and other diseases.
- Kale is a great anti-inflammatory food which helps with arthritis, asthma and auto-immune disorders.
- Kale is very high in Calcium! In fact one serving of kale has more calcium than a glass of milk!
Growing Kale
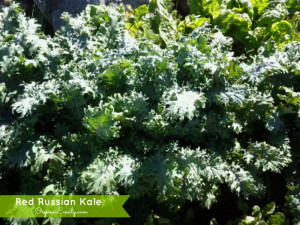
I like to grow a particular variety of kale called Red Russian. It’s flat green leaves are easier to work with for cooking and the flavor is a bit more mild. Kale is very easy to grow. It’s very cold hardy and can usually get through most winters, producing seed during the second season. During the cold winter months I have a hoop house over the box I grow my kale in to keep the leaves from freezing, using it throughout the winter months. In fact it gets sweeter the colder the temps are as long as the plant is protected, as with many cold crops. Simply sow the seeds either in early March or early August.
Cooking With Kale
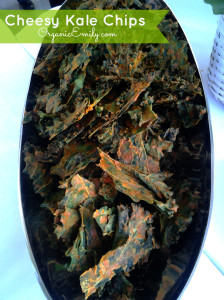
“Cheesy Kale Chips”
I bet you can’t just have one! These vegan “cheesy” kale chips are so good! My dear friend Janet gave me the recipe and it has been a huge hit ever since! They are very simple to put together and makes good use out of all that kale in the garden! Not to mention they are very healthy and nourishing!
2 bunches kale, torn into chip sized pieces
½ cup cashews
1 red pepper, chopped
½ lemon including the pulp (with your thumb and fingers, scrape and pull the pulp off the peel)
½ tsp. sea salt
½ cup brewers (nutritional) yeast
¼ cup water
2 T. minced onion
1 tsp. chili powder (or 1 jalapeno pepper, chopped)
½ tsp. turmeric
2 cloves garlic
1 T. agave
Fill a large bowl with prepared kale pieces. Put the rest of the following ingredients into a blender and blend until smooth. Pour the topping over the kale pieces and mix together with a large spoon. Make sure each piece is covered. Place the kale pieces on dehydrator trays. Do not double stack them. Dry at approximately 160` for about 6 hours or until crisp.
Spaghetti with Kale and Chickpeas
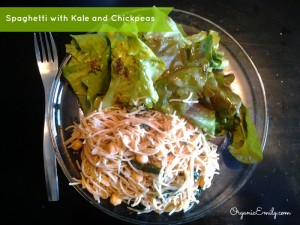
I love this meal! It’s fast, healthy and filling. And a great way to add kale to your diet. I served salad greens from my garden with the spaghetti and made a lemon dill vinaigrette to go on top. Delicious!
1 lb. whole wheat spaghetti
1 tablespoon olive oil and 1 tablespoon butter for cooking
1 large onion, chopped
5-6 garlic cloves , minced
1 can chickpeas, drained
1 large bunch of kale or Swiss chard
Juice of 1 lemon
Parmesan cheese
Salt and pepper to taste
Cook the noodles according to the package directions. In the meantime, saute the onions and garlic in a large dutch oven, until lightly browned. Add the chickpeas. Before draining the noodles, reserve 1 cup of the hot pasta water and add to the bean and onion mixture. Add drained noodles and kale. Once the kale has wilted down, add the cheese and salt and pepper to taste. Serve and Enjoy. Recipe inspired by “Spilling the Beans Cookbook”
Energizing Green Drink
This is such a delightful recipe! It’s packed full of nutrients leaving a natural energy buzz behind! It’s best to use a juicer, but if you don’t have one, a blender and strainer will do the trick too!
5 large leaves of kale, ribs discarded
1 lemon, zest and pith removed
1 large apple, roughly chopped
A 1-inch piece of fresh ginger
1 sprig of fresh mint
Push all ingredients through a juicer. If using a blender, add 1/2 cup purified water and strain through a fine mesh strainer and drink immediately!