Mayan Chocolate Caramel Sandwich Cookies

Mayan Choclate Caramel Sandwich Cookies

These cookies aren’t what you think!  They pack a little heat and a big chocolate punch!  The caramel adds a smooth chewiness that balances the cocoa and cayenne!  I promise you won’t be disappointed!

Recipe

3/4 cup butter, softened

1 cup sugar

3/4 cup dutch processed cocoa

1/2 teaspoon cinnamon

1/4 teaspoon salt

1/4 teaspoon cayenne pepper

1 egg

1 1/2 teaspoons vanilla

1 1/4 cups all-purpose flour

1/2 cup prepared dulce de leche or Peter’s caramel

Cream butter and sugar in a large electric bowl fitted with a paddle attachment.  Add cocoa, cinnamon, slat, cayenne, egg and vanilla.  Add the flour.  Divide dough in half and chill for 30 minutes of until it is easy to handle.  Shape each portion into 1 3/4-inch logs.  Wrap and refrigerate for 4 hours or until firm enough to slice 1/4-inch thickness.

Preheat oven to 325` F.  Line cookie sheet with parchment and place slices 1-inch apart.  Bake for 12-14 minutes.  Cool completely on wire racks and then heat caramel so it is easy to use.  Sandwich the cookies with caramel inbetween and let set before eating.  Careful the caramel can get very hot!


Lemon Rosemary Butter Cookies with Lemon Cream Cheese Frosting

Lemon Rosemary Butter Cookies with Lemon Cream Cheese Frosting

This cookie screams happiness!  Its perfect blend of brightness and buttery goodness will cheer anyone up! It’s creamy frosting and subtle hint of rosemary as it brings this cookie to another level!  Give them a try and let me know what you think!

Recipe

1 cup butter, softened

3/4 cup organic sugar

2 teaspoons freshly minced rosemary leaves

2 teaspoons freshly grated lemon peel

1/2 teaspoon baking powder

1/4 teaspoon salt

1 teaspoon vanilla

2 1/4 cup flour

Preheat oven to 400` F.  Line cookie sheet with parchment paper or grease well.   In a large electric bowl fitted with a paddle attachment cream butter and sugar.  Add rosemary, lemon peel, powder, salt and vanilla.  Mix the flour in until just combined.  Shape dough into 1-inch balls and flatten on pan with a glass dipped into sanding sugar, about 1/2-inch thick.  Bake for 8-10 minutes or until the bottoms are lightly browned.  Cool completely on wire rack before icing.

Icing

4 ounces room temperature cream cheese

2 cups powdered sugar

Juice from 1 lemon

Blend well and spread on cooled cookies.

Basil Honey Butter Cookies

Basil Honey Butter Cookies

These little cookies deliver a nice subtle surprise!  Infused with basil, honey and a little orange zest or essential oil, you’ll find these absolutely lovely!  Perfect to go with afternoon or evening tea!

Recipe

1 cup butter

2/3 cup organic sugar

1 egg

2 tablespoons honey

1 tablespoon finely chopped fresh basil or 1 tsp. dried, crushed

2 teaspoons finely shredded orange zest or 3 drops orange essential oil

1 teaspoon vanilla

3 cups all-purpose flour

sanding sugar or powdered sugar

Preheat oven to 375`F.  Prepare and grease cookie sheet pans.  Cream butter and sugar in an electric bowl fitted with a paddle attachment.  Beat in egg, honey, basil, orange peel and vanilla until just combined.  Add flour and mix until just combined.  Roll dough into 1-inch balls and flatten with a stamp or glass cup to 1/4-inch thickness.

Bake for 8-10 minutes or until the bottoms are lightly browned.  Cool on wire racks.  Dust with sanding sugar or powdered sugar.


Sunny-Side Up Personal Pizzas!

Sunny-side Up Pizza

Now here is a new twist on pizza!  These personal pizzas are fun for the whole family to help make!  My kids loved rolling out their own little pizzas and enjoyed eating them too!  They can be made for breakfast, lunch or dinner!  This recipe makes 4 personal pizzas or 2 large.

Recipe

1 lb. pizza dough (see recipe below)

1 cup tomato or pizza sauce

2 cups shredded mozzarella cheese

Additional toppings of your choice, such as mushrooms, onions, peppers, olives, spinach, etc.

4 large eggs

Basil leaves for garnish

Preheat oven to 450 degrees.  Divide dough into 4 pieces and roll out on a floured surface, about 1/2-inch thick.   Place 2 pizzas on a oiled jelly roll pan and bake for 10 minutes.  Take out of oven and place sauce and toppings on the pizza, including cheese.  Crack one egg over the top and put back into the oven for 15-20 minutes longer until the cheese is bubbly and the egg is set.  Garnish with basil.


Pizza Dough

1 cup rinsed and drained canned white beans

1 cup warm water, divided

2 1/4 tsp. active dry yeast

1 tsp. sugar

2 1/2 cups flour, either all all-purpose flour or half white, half wheat

1 tsp. salt

2 Tbsp. olive oil

In a blender puree beans with 1/4 cup of the water until completely smooth.  In a small bowl stir together the remaining warm water, yeast and sugar.  Make sure the mixture gets foamy to ensure the yeast is fresh.  In a large electric bowl fitted with a bread dough hook add the water and bean mixtures together along with 1 cup flour.  Add the oil and salt.  Add the remaining flour and mix until the dough begins to pull away from the sides of the bowl.  Knead a few times on an oiled surface.  Place in a large bowl and cover with plastic wrap and let stand for 1 hour or until doubled in size.  Once the dough has raised punch down and proceed with directions above.


Tabbouleh with Barley and Chickpeas

Tabbouleh with Barley and Chickpeas

This refreshing salad is light and savory!  Anytime you put a legume (bean) and grain together it makes a complete protein!  It’s perfect for an easy summer dinner side or main course!

Recipe

1/2 cup pearl barley

1 bunch parsley, chopped

1-2 cups chopped spinach

4 green onions, chopped

1/4 cup chopped mint

2 Roma tomatoes, chopped or 1 cup grape tomatoes sliced in half

1 can chickpeas, rinsed and drained

Dressing:

4 to 6 tablespoons fresh squeezed lemon juice

1/4 cup olive oil

1/4 tsp. sea salt

Freshly ground black pepper

Cook barley in 1 cup water in a rice cooker or on stove top.  In a large bowl mix all ingredients together.  In a small bowl mix all dressing ingredient together.  Once the barley is cooked place in large bowl with the other ingredients and drizzle dressing over top while still warm.  Serve and enjoy at room temp or cold.  Can be refrigerated for up to 2 days.

Patriotic Flag Berry Tart

Flag Berry Tart

Although the 4th has passed us by I still wanted to post one of my most favorite desserts!  It can be made in a round tart shell pan and served with a variety of fruit on top!  This beautiful and patriotic tart is so delicious with it’s secret chocolate bottom and creamy filling, you think you’d died and gone to heaven!

Recipe

For the crust:

2 1/2 cups all-purpose flour

1/4 cup sugar

1/4 teaspoon salt

1 cup (2 sticks) butter, cold and cubed

2 large egg yolks

2-4 tablespoons cold heavy cream or ice water

Pulse flour , sugar and salt in a food processor until combined.  Add the butter, and pulse just until mixture resembles coarse meal.  Add yolks and drizzle 2 tablespoons cream evenly over mixture; pulse just until dough begins to come together, no more than 30 seconds.  If dough is too dry, add remaining cream, 1 tablespoon at a time, and pulse.  Divide dough in half, pat each half into a disk, and wrap in plastic.  Refrigerate 1 hour or up to 2 days, or freeze up to 3 months (thaw in refrigerator before using).

On a lightly floured surface, roll out 1 disk of dough into an 18-by-18-inch rectangle, 1/8-inch thick.  Roll out a round if using a round pan.  Fit dough into a 14-by-4-inch fluted tart pan; trim excess dough flush with rim.  Pierce bottom of shell all over with a fork.  Refrigerate or freeze until firm, about 30 minutes.  Repeat with second disk of dough.


For Filling and Topping:

8 ounces cream cheese at room temperature

1/2 teaspoon vanilla extract

1/2 cup powdered sugar

1 cup whipping cream

4 ounces semi-sweet chocolate chips

Fresh berries and chopped fruit (blue berries and raspberries for the flag)

Preheat the oven to 375 degrees.  Place pans on a rimmed baking sheet.  Line shells with parchment or foil, leaving a 2-inch overhang.  Fill shells with pie weights or dried beans.  Bake until edges are just starting to color, about 25 minutes.  Remove parchment and weights; continue baking until crusts are dry and evenly browned, 10-15 minutes more.  Transfer to wire rack; Place the 4 ounces of chocolate on the bottom of the warm tart shells and allow to sit for a few minutes.  Spread evenly over bottom and allow to completely cool before taking the tarts out of the molds.

Beat the whip cream, vanilla and powdered sugar on high until the cream starts to form peaks.  Set aside.  Beat the cream cheese until smooth and fold in the cream mixture.  Smooth over the chocolate in the tarts.  Place berries according to your liking.  Enjoy!


Coconut Curry with Garden Vegetables and Chicken

Coconut Curry with Veggies and Chicken

This was my own spin on a recipe I saw in a magazine.  This hearty meal is packed with fresh herbs and veggies from the garden.  It was very simple and so delicious!  Make it vegetarian and leave out the chicken if you want too!  Veggies from my garden: zucchini, onion, peas (frozen), carrots, potatoes, peppers and basil and chives.

Recipe

1-2 tablespoons olive oil

1 yellow onion, chopped

1 red bell pepper, chopped

1 yellow bell pepper, chopped

3 whole carrots, chopped

3-4 Yukon gold potatoes, chopped

1 medium zucchini, chopped

1 cup fresh sugar snap peas chopped or you can use frozen petite peas too

2 teaspoons curry powder

1/2 teaspoon tumeric

salt and pepper to taste

2 cans light coconut milk

1/2 cup fresh chopped Thai Basil

1/4 cup fresh chopped Chives

Rotisserie chicken, meat removed and cubed


Add the oil, chopped onion, carrots, peppers and potatoes to a large dutch oven and cook for about 10 minutes, stirring occasionally.  Add the peas and zucchini and seasonings.  Cook for a few more minutes and then add the coconut milk.  Bring to a boil and then turn the heat down to medium low.  Allow to simmer until potatoes and carrots are soft, about 10-15 minutes.   Add the chicken until heated through if using.  Turn heat off and add the herbs.  Serve over cooked brown rice.


Clay Stamped Garden Markers

Clay garden markers 5

Here’s a project you can do with your kids!  Mine loved rolling the clay and stamping the letters!  These darling garden markers are reusable and weather proof because the words are stamped into the soft clay before placing them into the oven to dry.  Plan on making 18-20 garden markers with a 1lb. package of polymer clay.  We used our metal stampers from our Spoon Garden Marker project, but you can also use rubber stamps too!  The process is very simple!

You will need:

1lb. Polymer clay

Knife

Rolling pin

Metal or Rubber stamps

Jelly roll pan lined with parchment paper

275 degree oven

Clay garden markers 1

Cut the clay to make 1 inch clay balls.  Roll the balls into 5 inch logs.

Clay garden markers 2

Roll the log flat at a 1/4 inch thickness.  Cut the bottom at an angle for the marker to easily penetrate the soil.

Clay garden markers 3

Stamp the clay with metal or rubber stampers with what you plan on growing!

Clay garden markers 4

Place the soft clay markers on a jelly roll pan lined with parchment paper.  Bake at 275 degrees for 15 minutes or until the clay stiffens.  Let cool and place where needed!

Growing and Using Medicinal Herbs: Lavender

Lavender Plant

I love lavender!  It serves so many purposes both in the garden and home!  Lavender is easy to grow, beautiful, aromatic and attracts honey bees and other beneficial insects into the garden.  It is a sun loving, drought tolerant perennial and grows best in well draining soil.   Look for babies that come up every year and replant them in areas they can fill in.   You can also divide the root ball once the bush is large enough at about 3 years old.  Most types of lavender are medicinal.  Highly regarded varieties are L. officinalis and L. angustifolia.

In the home I use it with chamomile and lemon balm to make a relaxing tea or infuse a cup of lavender tea into fresh lemonade!  Lavender icing on sweet sugar cookies is quite a gourmet treat too!  It’s easy to make an infused calming lavender massage oil and headache tincture.  I’ll show you how later in the post.

Harvesting Lavender

Harvested Lavender

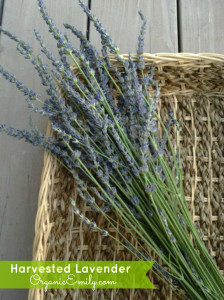
This week I have been harvesting my lavender buds just before they bloom into full flower.  If you harvest the flowers when they are in full bloom the medicinal properties won’t be as strong or last as long.  Dry your flower buds in a basket under the shade of a tree, or hung upside down in a cool dry room in the house or in a dehydrator on the lowest setting at around 95 degrees or lower.

Laveder Jar

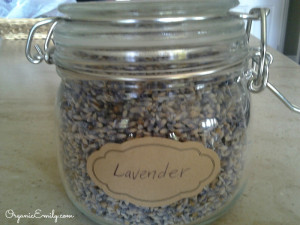
Once the buds are completely dry, remove them from their stems and place in a glass jar with a lid.  Lavender has profound calming and uplifting effects.  It has been used as a mild anti-depressant for many years.  It’s also great for tension headaches and insomnia.  I always have a bottle of lavender essential oil around to use as an antiseptic.  It’s antibacterial and antifungal properties helps to keep scrapes and burns clean and free from infection.  Essential oil from the lavender plant has been known as the “First Aid in a Bottle” because it is so versatile!  It’s ability to take the sting out of a bee sting or other insect bites is unbeatable!  It even helps take the pain out of burns and cuts.  Try a few of these fabulous recipes from my favorite book by Rosemary Gladstar, “Medicinal Herbs, A Beginners Guide”.

Calming and Antiseptic Lavender Spray

This recipe is simple, extremely versatile and safe for everyone!

7 tablespoons purified water

1 tablespoon witch hazel extract

10 drops lavender essential oil

1 (4 ounce) spritzer bottle

Place all ingredients into the bottle and shake well before using.  You can use it to mist bedsheets, a car or other rooms in the house.  I like to spray it on cuts and scrapes as an antiseptic.  It’s also great for spraying on public door nobs or on hands as a cleaner.

Lavender-Feverfew  Migraine and Headache Tincture

1 part lavender buds

1 part feverfew leaf and flower

80-proof alcohol, unpasteurized apple cider vinegar or glycerin

Place the herbs in a quart jar and cover with alcohol by an inch.  Place on counter for 3-4 weeks in a visible place and shake every day.  Strain with cheese cloth and keep in a dark blue or amber bottle out direct sunlight.

To Use:

For long term use for migraine headaches, take 1/2 teaspoon 2x a day for up to 3 months.  Discontinue use for 3 to 4 weeks and them repeat the cycle.  For severe acute situations take 1/4 teaspoon every 20-30 minutes for up to 2 hours.  Do not use during menstruation because it can stimulate bleeding.


Calming Lavender Massage Oil

1 1/2 ounces dried lavender buds

4 ounces nut or seed oil (apricot, grapeseed or almond)

10 drops lavender essential oil

1 glass quart jar

Pour oil over lavender buds.  Cover with lid and let sit in a sunny warm spot for 2-3 weeks.  Strain the buds out of the oil and place in jar.  Add the essential oil and keep in a cool dry spot for up to 6 months.  Use in a bath or for massage.

DIY Garden Markers

Garden Marker Spoon 1

These durable garden markers were fun to make and not as hard as I thought they would be.  I saw this idea online and wanted to make them for my garden!  All it took was a few tools and a little muscle to pound the spoons flat.  Great for working out any aggression! 🙂  And I like that the words won’t wash off with time and weathering.

Supplies

Tools for Garden Marker Spoons

All you will need is:

  • Metal Stampers (I got mine off amazon for $15)
  • Old Spoons (second hand stores are great for this!)
  • Hammer
  • Permanent Marker (to fill in the stamped words)
  • Hard surface to hammer the spoons on ( I used an old paver)


Directions

  1. Hammer the spoons flat on a hard surface that won’t break.
  2. Stamp your spoons with the names of veggies and herbs you are growing in your garden with hammer.
  3. Color in the words with a permanent marker an wipe off leaving the words darkened and easier to see.
  4. Place in garden where needed!